28/08/19 - 19/09/19 (Week 1 - Week 4)
Atiqah Farzana Binti Syalleh Karimyee (0336740)
Typography
Exercises
LECTURE NOTES
Lecture 1: Briefing
28/08/19
Today Mr. Vinod and Mr. Shamsul briefed us on this module, our assignments, and a short lecture explaining what typography is. We had to make a new blog and they explained a very specific format in which we have to follow. They also showed us a few blog examples from the previous batch for us to reference.
Lecture 2: History of Typography
04/09/19
Today's lecture was on the development of typography over centuries. The earliest form of writing was essentially just etching a stick onto wet clay, or using a chisel to carve onto stone. The Phoenicians developed the earliest letterforms, with uppercase letters being straight lines and pieces of circles. They wrote from right to left, but the Greeks invented a new form of writing called ‘boustrophedon’ which starts from left to right, and once it goes to the bottom text, it goes from right to left, and continues to alternate like this as it goes on.
 |
| Fig. 1.1 Boustrophedon |
Etruscan and Romans would paint the letterforms before inscribing them, thus leaving certain qualities of their strokes—thickness, weight from vertical to horizontal—to be carved into marble.
Square Capitals were a written version found in Roman monuments, but soon turned into Rustic Capitals which were compressed to save space, write twice the amount of letters and save time in writing. Both these letterforms were reserved for important documents or intended purposes, so everyday writing would just be done in cursive which is the beginning of lowercase letters.
 |
| Fig. 1.2 Square Captitals |
 |
| Fig. 1.3 Rustic Capitals |
Charlemagne standardized letterform all throughout Europe, thus setting it as a standard for calligraphy for a century. After the end of his reign, a new letterform known as Blackletter (Textura) gained popularity. It was condensed and strongly vertical, whilst the Rotunda, a rounder and more open hand letterform was spreading in the south.
 |
| Fig. 1.4 Blackletter (Textura) |
 |
| Fig. 1.5 Rotunda |
Johannes Gutenberg invented a printing method to mimic the work of the scribes' hand. His type mold required a different brass matrix, or negative impression, for each letterform.
 |
| Fig. 1.6 Gutenberg Bible |
Lecture 3:
11/09/19
'Kerning' is the automatic adjustment of space between letters, whilst 'letterspacing' is to add space between letters. 'Tracking' is the removal or addition of space in a word or sentence. There are three types of tracking which are normal tracking, loose tracking and tight tracking.
 |
| Fig.1.7 Kerning Example |
 |
| Fig. 1.8 Tracking Example |
'Gray value' is the gaps or spaces in between words in text, which can be seen by squinting your eyes. If the distribution of grey matter is even, then it is balanced with the text.
'Flush left' or left alignment is where each line starts at the same point but ends wherever the last word of the line ends. This mimics the asymmetrical look of handwriting. There is an even gray value with the spaces between words being consistent throughout the text.
 |
Fig. 1.9 Flush Left Example
|
'Centered' formatting makes the text symmetrical and imposes a balance of value and weight on both ends at each line. It transforms the fields of text to look like shapes, so it is important to put line breaks every so often to make the text look less jagged.
 |
Fig. 1.10 Centered Alignment Example
|
'Flush right' or right alignment puts an emphasis in the end of a line rather than the start. This type of alignment is frowned upon and should be used minimally.
 |
| Fig. 1.11 Flush Right Exanple |
'Justified' alignment has a symmetrical shape on the text, where both ends are evenly distributed. The expanding or reducing of space in words or letters cause gaps known as 'rivers' to run vertically through the spaces of text.
 |
Fig. 1.12 Justified Example
|
All designers are different, so their choice of formatting or alignment is up to their personal preference or cultural background or however they would want to convey their message. However, if the reader sees the type first rather than the actual words, then it is simply an interference and the type must be changed.
Different typefaces suit different messages, and a good typographer should be able to know which typeface to use when.
A type specimen book is used to provide an accurate reference for type, type size, type leading and type line length. An example of one would be 'Typographic Systems' or 'Letraset' as Mr. Vinod has suggested.
X-Height is the space between height and baseline of a text.
 |
| Fig. 1.10 Anatomy of a Typeface |
What to remember:
1. Line length is the length of a text. A good rule of thumb is for it to be anywhere between 55-65 characters long.
2 Identify your font/ typeface.
3. Identify your type size. Printed matter should be anywhere from 8pt - 12pt.
4. Line length and leading. When maintaining a 3pt leading, this will add onto your type size (8pt type size + 3pt leading = 11pt).
Lecture 4:
18/09/19
There are several ways of indicating a new paragraph. In the olden days, a pilcrow was used to indicate the start of a new paragraph. Without having to make a line space (or leading) below for every paragraph, this symbol helps saves a lot of space.
 |
| Fig. 1.11 Pilcrow Symbol |
 |
| Fig. 1.12 Pilcrow Used in Text |
Fig. 1.13 Below shows an example of text with a line space (leading) between paragraphs. If the line space is 12pt, then the paragraph space must also be 12pt in order to create a cross-alignment across columns of text.
 |
| Fig. 1.13 Line Space |
 |
| Fig. 1.14 Leading and Line Space Analogy |
Leading is the space inbetween the texts, whilst line space is the text and space combined. It is sort of confusing at first, but Fig. 1.14 explains it very clearly.
 |
| Fig. 1.15 Leading with Indentation |
Fig. 1.15 shows a chunk of text with leading and indentation. Typically, the indent should be the same size as the line spacing or the same point size as the text. The standard indentation was made popular by newspapers as they found that it saves the space to not have to add leading.
A widow is a short line of type left alone at the end of a column of text.An orphan is a short line of type left alone at the start of a new column.
 |
| Fig. 1.16 Widow and Orphan Example |
Widows and orphans are very frowned upon yet are still quite common in large amounts of text. Typographers must make sure their work does not have both of these unwanted things. To fix them, the paragraph needs to be so that the last sentence is not as short. In certain cases, kerning might help, but too much can cause rivers or an uneven gray value in the text.
There are various ways of highlighting a text to make it stand out. Different techniques will create different contrasts. The following techniques include changing/ making the text:
- Italic
- Bold
- Font
- Colour
 |
| Fig. 1.17 Highlighting Text |
In Fig. 1.18 Below, the highlighted text is in a different font (Univers) from the other paragraphs. As Univers is a sans serif font, it contrasts strongly against the serif font Times New Roman which is the font of the other texts. The Univers text had to be reduced by 0.5pt to match the x-height of Times.
 |
| Fig. 1.18 Highlight: Font Change |
 |
| Fig. 1.19 Univers VS. Times |
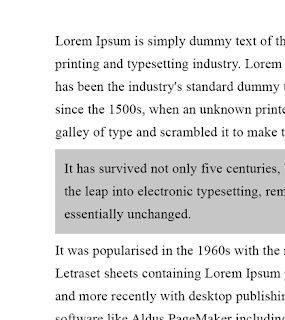
By adding a background colour against the highlighted text, it is important to maintain a left reading axis (Fig. 1.21) to ensure readability at its best. In Fig. 1.20 the entire highlighted text is indented, and the background colour is aligned with the other paragraphs which does not look very appealing as compared to Fig. 1.21.
 |
| Fig. 1.20 Highlight: Background Colour 1 |
 |
| Fig. 1.21 Highlight: Background Colour 2 |
Both Fig. 1.22 and Fig. 1.23 use bullets to highlight the text. Fig. 1.22 has the bullets outside of the left margin to impose a strong reading axis.
 |
| Fig. 1.22 Bullets Outside Margin |
 |
| Fig. 1.23 Bullets Inside Margin |
 |
| Fig. 1.24 Highlight: Quotation Marks |
Quotation marks create a clear indent and also breaks the left reading axis, just like bullets do. It is important to know the difference between primes and quotation marks. In Fig. 1.25, the top symbols are for inches and feet, whilst the bottom symbols are the actual quotation marks.
 |
| Fig. 1.25 Primes VS. Quotation Marks |
'A' head shows a clear break between the topics within a section. In the examples below, the 'A' heads are set larger than the text, in small caps and in bold, and can even extend to the left of the text.
 |
| Fig. 1.26 A Head Examples |
The 'B' head is a subordinate to 'A' heads, much like a sub heading. 'B' heads indicate a new supporting argument example for the topic at hand. They should not interrupt the text as strongly as 'A' heads do. In the examples below they are shown in small caps, italics, bold serifs, and bold san serif.
 |
| Fig. 1.27 B Head Examples |
Lastly, the 'C' heads. These are not as common but they highlight specific facets of material within the 'B' head text. They do not interrupt the flow of reading. As with 'B' heads, 'C' heads are shown in small caps, italics, serif bold, and sans serif bold. 'C' heads in this configuration are followed by at least an em space for visual separation.
 |
| Fig. 1.28 C Head Examples |
Putting together a sequence of subheads is called a 'hierarchy'. There is no right or wrong way to express a hierarchy; the possibilities are endless.
 |
| Fig. 1.29 Hierarchy Examples |
The cross alignment of headlines and captions with text type reinforces the architectural sense of the page- the structure- while complimenting the vertical rhythms. In Fig. 1.30, the left type has four lines of caption type (leaded 9pts) that cross align with three lines of text type (leaded to 13.5pts). I added numbers to the lines in Fig. 1.31 for an easier understanding.
 |
| Fig. 1.30 Cross Alignment Example 1 |
 |
| Fig. 1.31 Cross Alignment Example 1 (Numbered) |
To end this week's lecture, here are some of the terms and symbols we learnt:
- em space
- forced line break
- pilcrow
- end of text
Also, we were briefed on our first project. We were given 3 different texts to format and express in a new software, InDesign.
INSTRUCTIONS
Assignment brief:
EXERCISES
Lettering
(Week 1 - Week 3)
28/08/19 - 11/09/19
Our first exercise was to make an animated GIF from our name with our chosen personality. At first, I chose "open-minded" but it was quite challenging to work with, so I ended up choosing 'dreamer'.
 |
| Fig. 2.1 Open-Minded: Sketches |
Mr. Vinod told me tho choose my first sketch, the cloud- like font. I quite like it and think it represents 'dreamer' well as it takes the term literally (dreaming when sleeping). I then continued to work on it to create a better look.
 |
| Fig. 2.2 Dreamer: Sketches |
My initial vision was to have the letters floating, slightly moving. That seemed a bit plain, so I thought that a sheep would be a nice touch as a reference to counting sheep. I was deciding where the sheep would come from- out of frame, from above, or the left side. In the end I decided to turn the first 'A' of my name into the sheep, and it would jump over the 'T' and become the dotted 'i'.
 |
| Fig. 2.3 Dreamer: Sketches 2 |
 |
| Fig. 2.4 Dreamer: Sketches 3 |
 |
Figure 2.5 Dreamer: Static Lettering
|
 |
Figure 2.6 Dreamer: Artboards
|
In total I have 57 artboards and I exported them into Photoshop to turn them into a GIF. After seeing the animation I noticed some errors in certain artboards, so I went back on Illustrator to fix them. After adjusting any changes I had to export the said artboards back into Photoshop.
 |
Figure 2.7 Dreamer: Photoshop Frames
|
Figure 2.9 Dreamer: PDF
 |
| Fig. 2.10 Dreamer: GIF |
Type Expressions
(Week 3 - Week 4)
11/09/19 - 19/09/19
Our second exercise was to make 6 designs from the given words: Sneeze, gigantic, clean, party, emerge and explode. We were also given a variety of fonts to use but were only allowed to use those particular fonts for this exercise.
Firstly, I did sketches for my ideas.
 |
| Fig. 3.1 Gigantic: Sketches |
 |
| Fig. 3.2 Sneeze: Sketches |
 |
| Fig. 3.3 Party: Sketches |
 |
| Fig. 3.4 Explode: Sketches |
 |
| Fig. 3.5 Emerge: Sketches |
 |
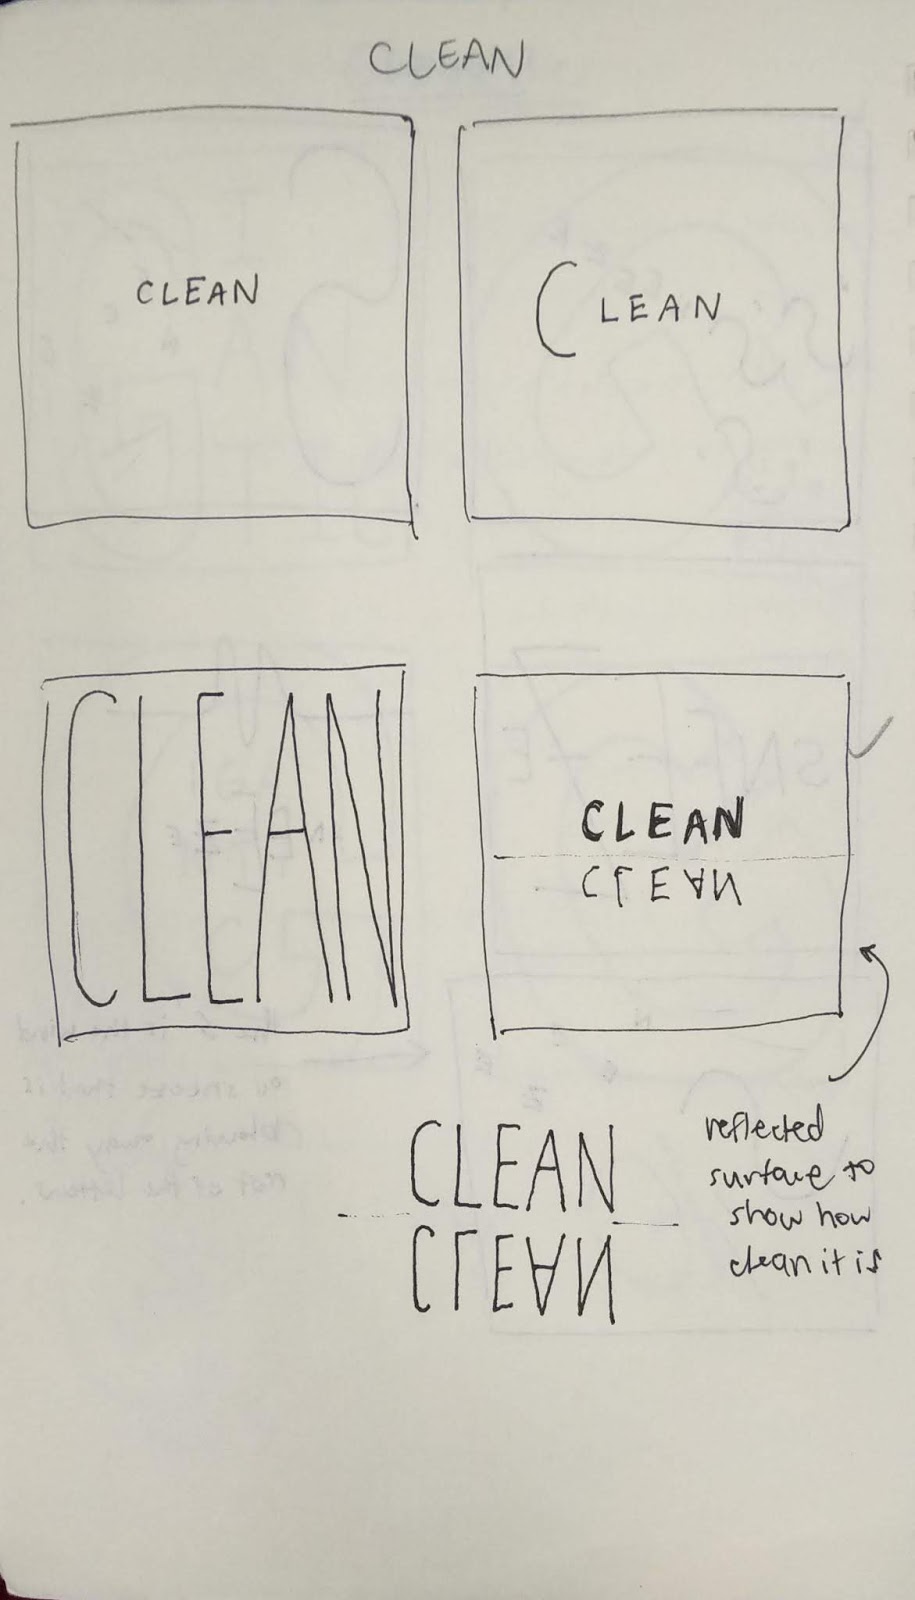
| Fig. 3.6 Clean: Sketches |
After showing these sketches, I got some approved and went ahead to do them.
 |
| Fig. 3.7 Lettering Designs |
Fig. 3.8 Lettering Designs: PDF
After completing all 6 designs, I had to choose one to animate. I especially like what I did for explode and thought it would be very impactful as an animation. My vision was to have the text 'explode' as just normal and then the 'o' would get bigger and bigger until it eventually explodes.
 |
| Fig. 3.9 Explode: Static Design |
 |
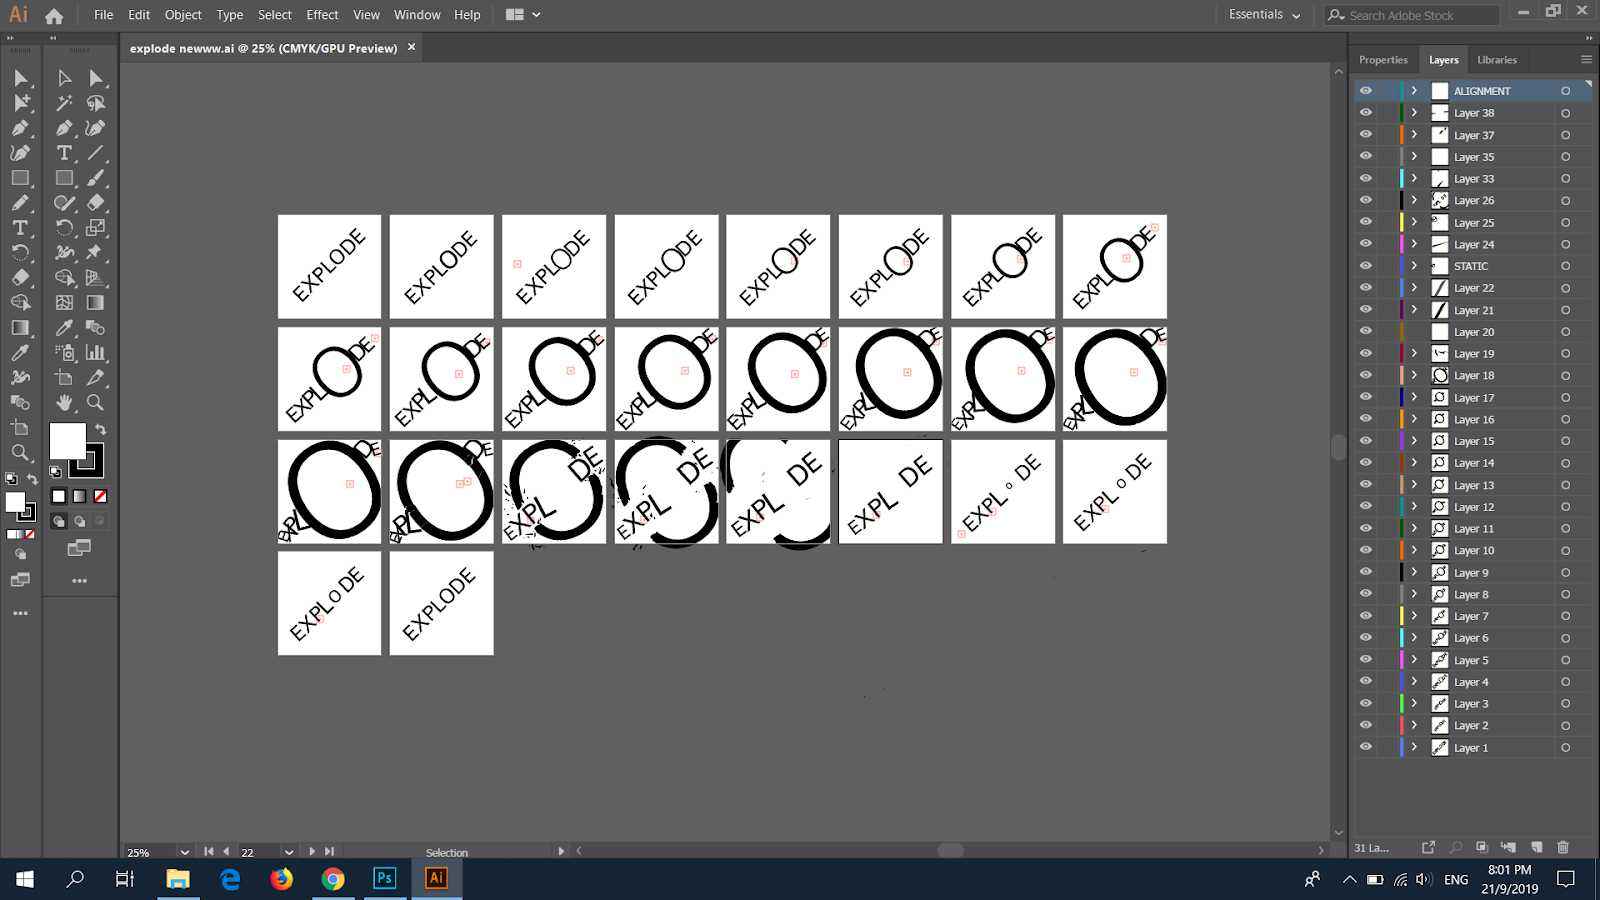
| Fig. 3.10 Explode: Artboards |
I exported the artboards into Photoshop to start the animation process.
 |
| Fig. 3.11 Explode: Frames |
I noticed I had a lot of alignment problems and some awkward frames so I went back to Illustrator to fix them. I had difficulty in doing this because I had to look back at each frame and try to adjust my text just by guessing. Moreover, the little broken pieces from the 'o' makes it very tedious to work around.
 |
| Fig. 3.12 Final Explode Animation |
I feel like it still is not perfectly aligned and that sort of messes up the whole animation. Also, when the 'o' breaks it goes slowly and it is not as powerful of a burst as I imagined. I felt like it was really, really anti-climatic. After receiving feedback, Mr. Vinod and Mr. Shamsul agreed that my GIF is very slow considering that it was supposed to explode. They suggested that I make the 'o' explode fully and I will try to achieve that.
I sketched out a rough idea of how I wanted to change it to. I drew out the frames so it would be easier to follow through as I did the artboards in Illustrator.
 |
| Fig. 3.13 Explode: Frames Sketch |
 |
| Fig. 3.14 Explode: New Artboards |
 |
| Fig. 3.15 Explode: New Frames |
 |
| Fig. 3.16 Explode: New Animation |
I am quite happy with how Fig. 3.16 turned out. I think the speed is much more appropriate and powerful compared to my first attempt. I also made it loops continuously and I think it made it much smoother.
FEEDBACK
Week 1: No feedback given.
Week 2: I showed a few of my ideas and sketches to Mr. Vinod and Mr. Shamsul to ask them which one I should use. Mr. Vinod told me to choose my first option, the cloud font.
Week 3: Mr. Vinod and Mr. Shamsul liked my GIF. They said I did a good job on it but I needed to work more on my eportfolio. My pictures in my blog are quite badly taken and they said that I should take better photos/scans or my marks might be deducted.
Week 4: Specific feedback: Mr. Vinod and Mr. Shamsul said that I need to quicken the pace of the GIF. They said that it does not really show 'explode' if it was so slow. They said that it was more of cracking rather than exploding. They suggested that the entire 'o' could have exploded, instead of just the sides of where the other text were. Moreover, Mr. Shamsul liked my 'party'.
General feedback: There are 2 submissions: 6 boxes in A4 and the animated work. Everything else is process, and can be a screenshot/screengrab. The final must not be a screenshot; it should be exported. Embed a PDF for the 6 words. Must download all 9 typefaces that were given. Process should be evident in our blog. Captions must be alongside pictures. Progression is key in the life of a designer. If we are no longer using a design, we should not delete it from the blog, but rather to just mend the caption.
REFLECTION
Experiences:
Week 1 (28/08/19); Sort of overwhelmed by the lecture and that we were already starting our first exercise, considering I have never used Illustrator before. At this point I did not even have a proper laptop, or any of the Adobe softwares so I am terribly anxious about what to do.
Week 2 (04/09/19); I was really stressed and slightly confused whilst doing my working class. I already laid out what I wanted to do for my animation but Illustrator was still very unfamiliar to me so I had to redo a lot of processes.
Week 3 (11/09/19); I feel more at ease when doing my work as I continued practicing on Illustrator. I was also very satisfied with my end product for my animation so it all worked out in the end. Doing the 6 letter designs was alright (a bit rushed due to class ending) but I felt like some of my ideas were quite similar to everyone elses.
Week 4 (18/09/19); Today's class was quite literally the definition of 'information overload'. Mr. Vinod briefed us on our first project and it was definitely a lot to digest.
Observations:
Week 1 (28/08/19); This class was significantly bigger than our other classes. Not quite sure whether this is a good or bad thing but overall class was okay. Also, the classroom is extremely cold and I wish I brought a thicker jacket.
Week 2 (04/09/19); I noticed that a lot of people are doing their work at ease (or that is what it seems like) whilst I was constantly having to redo my work because was still new to Illustrator. I also kept finding little details to fix and was never satisfied with my progress.
Week 3 (11/09/19); I noticed that I had a lot more frames that what most people did for their animation. I did not know whether I overdid it or not, but I spent a lot of time on redoing it until I was finally satisfied with the alignment and the smoothness of the jumping sheep.
Week 4 (18/09/19); Mr. Vinod and Mr. Shamsul made us walk around and look at other people's work for inspiration and to know where we are in terms of standard. I saw a lot of very creative and well-made animations from my peers. I think that being able so see other people's work helped me see the different ways in which they expressed themselves through their designs.
Findings:
Week 1 (28/08/19); Just trying to think of personality ideas was already hard. I felt like I was thinking more on the difficulty of digitizing the work rather than what my true personality traits were. I found myself searching for ideas online and asking my friends what their personalities were.
Week 2 (04/09/19); Although I really prefer using the touchpad on my laptop, I found that using a mouse was easier when doing these animations. Also, using a drawing tablet was much easier for drawing than a mouse (obviously). Using a drawing tablet to make my cloud font was a total breeze, yet I already completed so much of it using a mouse.
Week 3 (11/09/19); I found that I do work better when under pressure. When we only had about an hour to do our 6 designs, I did my work very quickly and efficiently than I could probably ever do at home. I laid out 3 out of the 6 designs and the work was not rushed nor low quality.
Week 4 (18/09/19); I found that recording a video (or just sound) is a much more efficient way of retaining information from lectures because I would either miss out on something or I would think "I could remember that" and just
not write it down.
FURTHER READING
New Typographic Design by Roger Fawcett-Tang and David Jury
(05/09/19 - 01/10/19)
 |
| Fig. 4.1 New Typographic Design Book Cover |
Even though I borrowed this book on the second week, I barely read it till the fifth week. Only after Mr. Shamsul stressed that we
have to read a book per week was when I understood the importance of further reading.
In this book, type is viewed from the different angles of:
- form
- image
- experiment
- and motion
Form
When a designer works with a conventional and commercially available typeface, they are able to focus more on the "essential qualities of the font". From this, they usually would seek out new typographic directions. Designers are able to put more attention towards their design as their type is clean and simple.
 |
| Fig. 4.2 Typography: Form Design Example |
Image
The opposite of clean and simple- designers are now trying to produce typography with an edgier, more illustrative, hand-drawn aesthetic. These designs are out of the ordinary, bold and brash and attention-seeking.
 |
| Fig. 4.3 Typography: Image Design Example 1 |
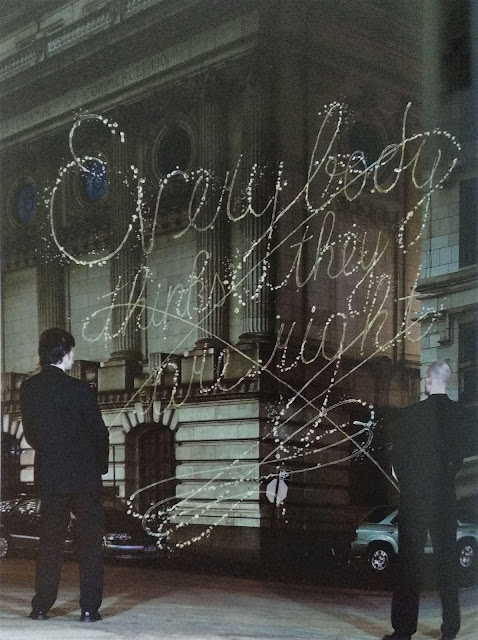 |
| Fig. 4.4 Typography: Image Design Example 2 |
Experiment
Designers are constantly on the search for new forms to go beyond the limits of typographic recognition and legibility. "Unconventionally arranged experimental typography slows down the reader because it requires conscious participation"- meaning that the reader would have to think about what the design really says.
Individual letters are merely abstract forms, but when they are teamed up with other letters, shapes start to form. In Fig. 4.5, some of the letters look almost like furniture (the b, d, and h look like chairs, whilst m and n look like tables).
 |
| Fig. 4.5 Typography: Experiment Design Example 1 |
Motion
Designers must also consider how their three-dimensional letterforms would appear from different angles and in-motion. The 'welcome' sign in Fig. 4.6 is made up of different layers, so that when people drive by it, it will take on different angles but will still be readable.
 |
| Fig. 4.6 Typography: Motion Design Example |
Field Guide: How To Be A Graphic Designer by Ana Labudovic and Nenad Vukusic
(05/09/19 - 01/10/19)
 |
| Fig. 4.7 Field Guide: How To Be A Graphic Designer Book Cover |
 |
| Fig. 4.8 Typography Section |
Fonts must be used with the proper or appropriate text. Longer text should use more regular and legible types, whilst short titles, excerpts or captions can be more decorative.
"When choosing a font, a designer must think about legibility and avoid creating the kind of visual chaos that ensues when one uses too many different types of letters."
Designers must always be aware on how their message is going to be conveyed. There should be a link between the typography and the nature of the publication that they would be using it for. This is for it to make 'virtual sense', meaning that a blood-dripping font would be more appropriate for a horror movie poster and not on a children's story book.
Although this book is not entirely about typography, this is the one-page section on it. Nonetheless, I think this book is very insightful and informative on a graphic designer's life. It takes on a more humorous and lighthearted approach to teaching which made it very easy to read for me.
 |
| Fig. 4.9 Page Illustration 1 |
 |
| Fig. 4.10 Page Illustration 2 |
I Love Type Series Volume One: I Love Futura edited and designed by TwoPoints.Net
(25/09/19 - 00/00/19)
 |
| Fig. 4.11 I Love Type Series Volume One: I Love Futura |
|
This book is basically about Futura, and why it is such a good typeface. The book continuously shows examples of other books, catalogues, album covers, magazines, business cards etc. which all have the Futura typeface on them. It puts Futura in a very positive aspect and shows how it has been used throughout the decades.
 |
| Fig. 4.12 "Is there a better typeface for a ___ than Futura?" |
|
 |
| Fig. 4.13 "Gewoon Hard Knallen": Page Spread |
|
 |
| Fig. 4.14 "Gewoon Hard Knallen": Art Installation and Business Card |
|
As there are way too many examples, I chose the one that was most interesting to me which is this installation piece/ business card project.
"GEWOON HARD KNALLEN" translates to 'just play hard". This large installation used Futura Extra Bold because "a bold and screaming typeface was needed to create this statement". The card consists of three pieces: a picture of the onsite installation, and two business cards. The business cards show two individual members of the company (StudioSpass) in the installation, and once removed shows the entire installation.
Futura is praised for its clean, versatile and effective styles. A lot of typographers and designers have their own reasoning for using Futura, but because it is a simple type, it can be used for anything. I think that its versatility makes it such a good type.
"The typeface expresses the modern eliminating non-essential elements"
I really liked this book because I also enjoy using Futura (5 out of 6 of my lettering designs use Futura). It just has an overall nice look to it which makes it very versatile and timeless.


No further reading
ReplyDelete